This blog shows to use error messages in different ways possible.
If you’re developing App for AppSource and want to give more detailed error message plus advanced capabilities to solve the error by end-users on their own.
Use Cases with examples:
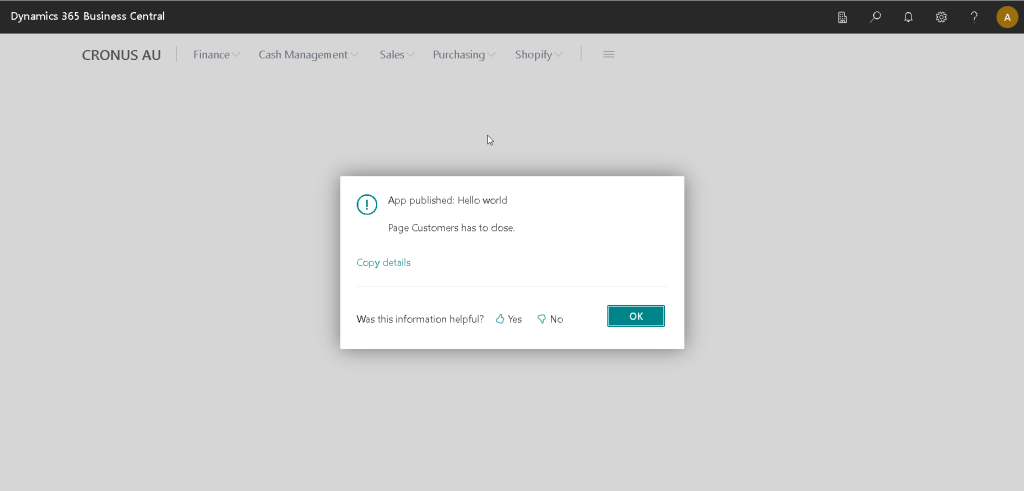
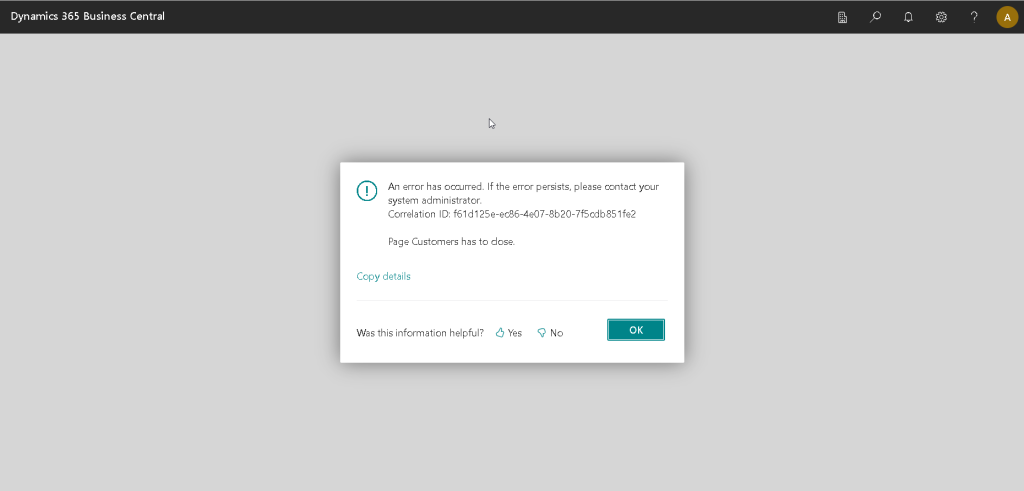
1. ErrorInfo.Create (not a data type but as a direct function)-
When used with Error() do not make any difference and will show below error.
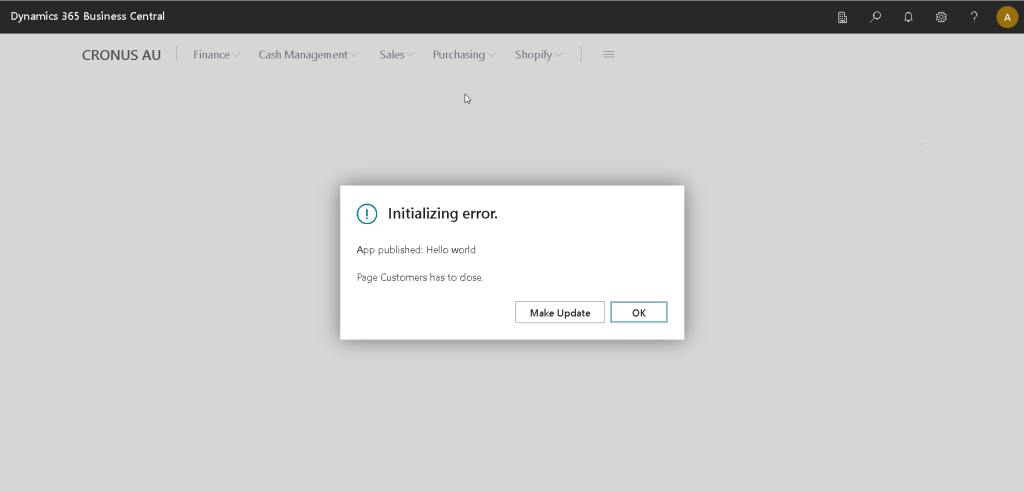
local procedure InitializeClientError()
    var
        InitializeErrorInfo: ErrorInfo;
        ErrorTitleLbl: Label 'Initializing error.';
        UpdateLbl: Label 'Make Update';
    begin
        InitializeErrorInfo.DataClassification(DataClassification::SystemMetadata);
        InitializeErrorInfo.ErrorType(ErrorType::Client);
        InitializeErrorInfo.Verbosity(Verbosity::Error);
        InitializeErrorInfo.Message(InitialMsg);
        InitializeErrorInfo.Title(ErrorTitleLbl);
        InitializeErrorInfo.AddAction(UpdateLbl, Codeunit::"Update MNK", 'UpdateOnCustomer');
        Error(InitializeErrorInfo);
    end;
codeunit 50100 "Update MNK"
{
    trigger OnRun()
    begin
    end;

    procedure UpdateOnCustomer(ErrorInfo: ErrorInfo)
    var
        SomeProcessesLbl: Label 'Some process or data updates here.';
    begin
        Message(SomeProcessesLbl);
    end;
}
Output:
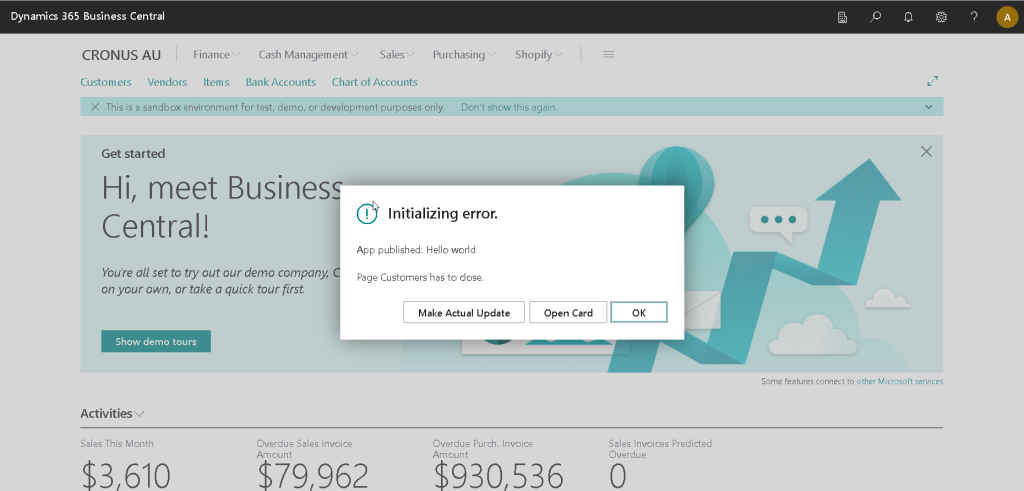
6. ErrorInfo (with Navigation)-
Purpose: To show some error message with a navigation, action and title.
It was hard to insert item tracking lines for item journals as they are saved in different table. Plus going to each journal lines and then inserting a lot/serial is a huge manual task.
Before Enabling:
The user needs to click on Item Tracking Lines and then enter Lot/Serial for that item (which needs to be done for all items if list is huge):
Solution:
On journal batches, enable the setup as shown in below snapshot.
After Enabling:
Four fields (highlighted below) would be shown on Item Journals Line (you must have seen them in Item Reclassification Journals).
Entering the data or uploading the data here allows to create a Item Tracking Lines in background.
This helps in uploading opening inventories in easier manner for items with lots / serials.
Same feature is available on Warehouse physical journal. Give it a try!!
Users by default are allowed to access the data of Microsoft Dynamics Business Central (BC) which they can view the table or check the values which we some installations may not need.
Before Changes:
Users can access the said details either by pressing the [Ctrl] + [Alt] + [F1] on their keyboard or by going to ‘Help and Support’ -> ‘Inspect Pages and Data’
The screen looks something like shown below:
Solution:
Create a new Permission Set in BC as shown below:1
Type
Object Type
Object ID
Object Name
Exclude
System
1350
Run Table
Exclude
System
5330
Tools, Zoom
Permissions under new Permission Set create.
Assign the permissions to the users and ask them to re-login in BC.
After Changes:
Now ask users to re-login to BC and they will not see the data under Page Inspection. The screen would look like below:
This blog is to give small idea, hint or knowledge on how you can use DocFx for generating a simple static documentation portal.
Just to give the idea, this same tool is used by Microsoft for maintaining ‘https://docs.microsoft.com‘ hosted on GitHub. I will be showing, and hosting pages created using DocFx on App server instead of using WordPress / Github page or other provider for hosting the help manual.
Pre-requisites:
Markdown language
YAML/JSON understanding
DocFx (from Github) – The same can be installed using Nuget or Chocalatey package (which is NOT shown on this post)